我们将绘制一个圆形的音乐播放控件,它包含一个圆形的进度条、专辑页面和播放按钮。
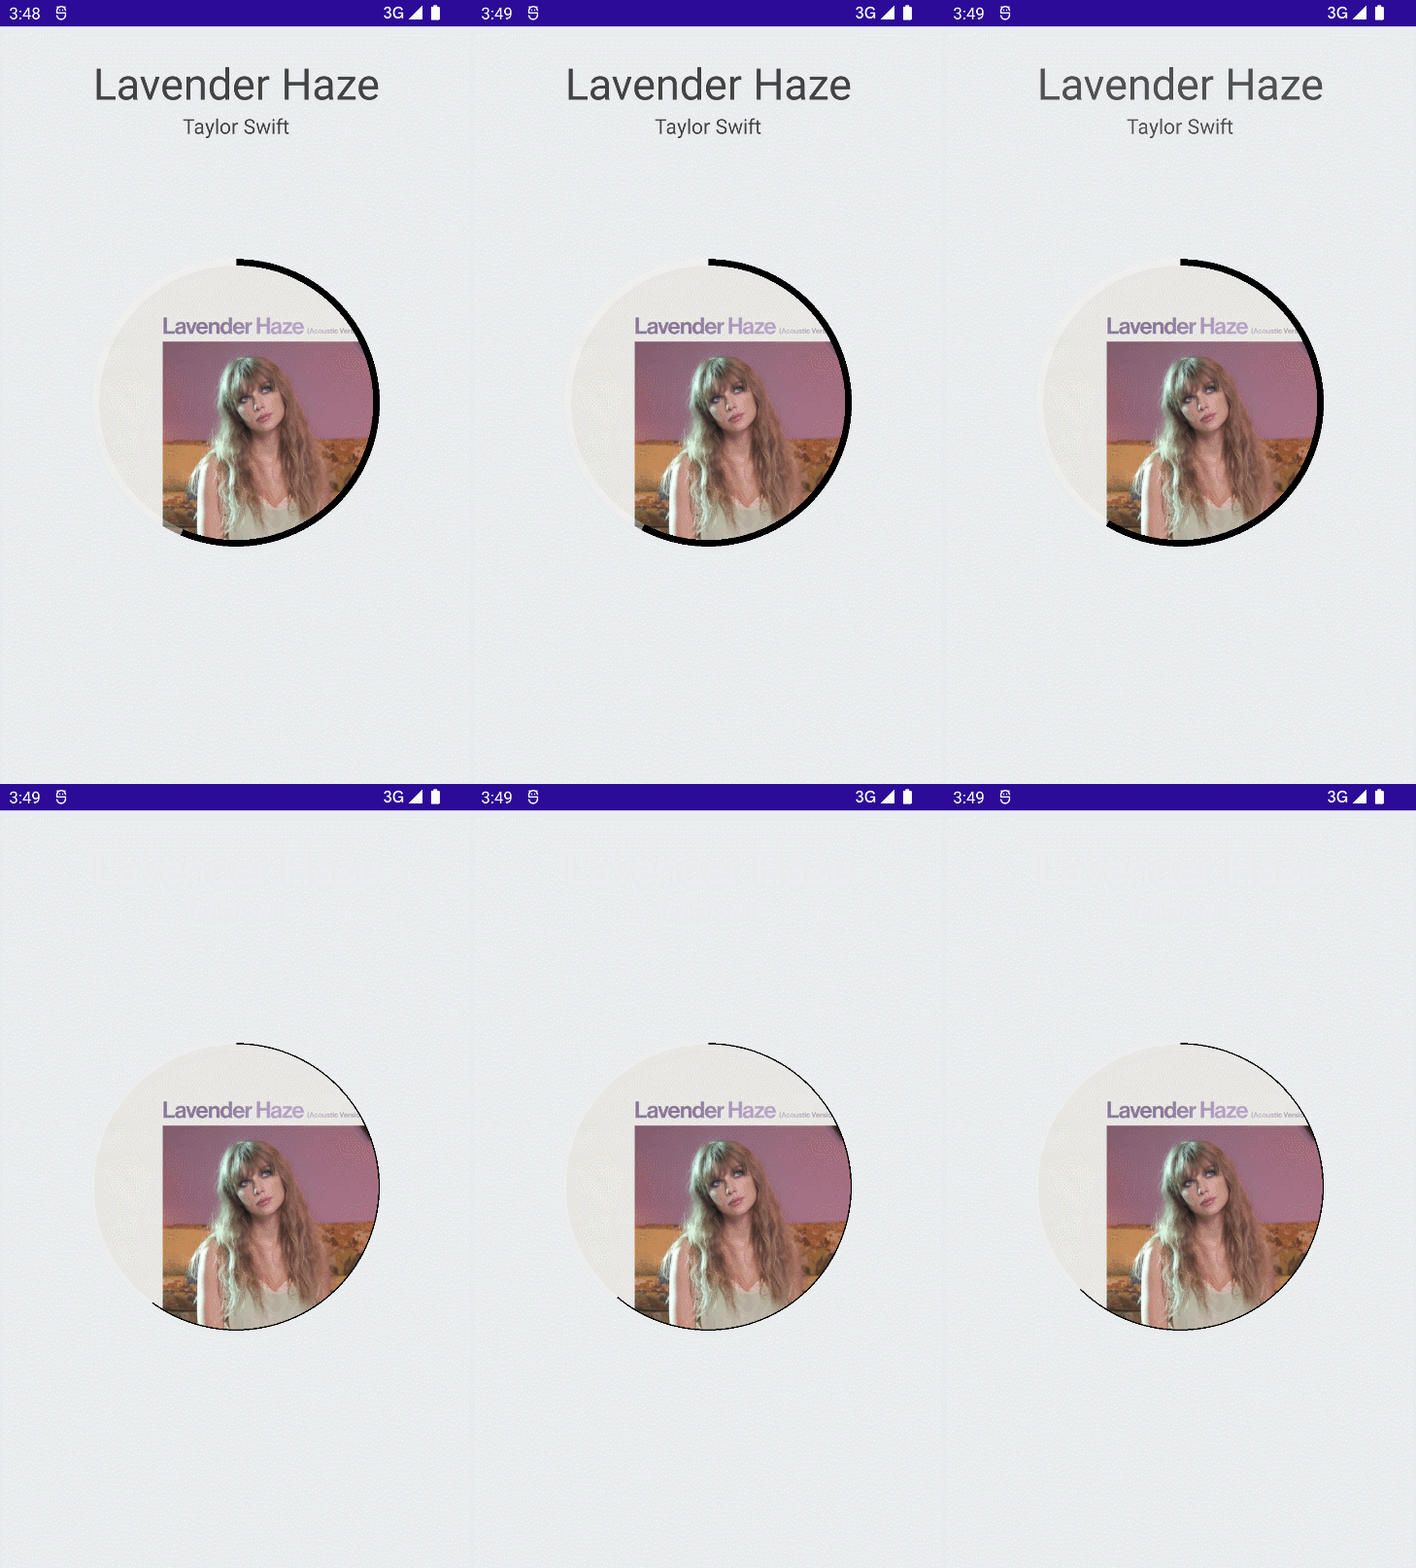
关于图形绘制
使用MAUI的绘制功能,需要Microsoft.Maui.Graphics库。
1
| Microsoft.Maui.Graphics 是一个实验性的跨平台图形库,它可以在 .NET MAUI 中使用。它提供了一组基本的图形元素,如矩形、圆形、线条、路径、文本和图像。它还提供了一组基本的图形操作,如填充、描边、裁剪、变换和渐变。
|
Microsoft.Maui.Graphics在不同的目标平台上使用一致的API访问本机图形功能,而底层实现使用了不同的图形渲染引擎。其中通用性较好的是SkiaSharp图形库,支持几乎所有的操作系统,在不同平台上的表现也近乎一致。
创建自定义控件
在项目中添加SkiaSharp绘制功能的引用Microsoft.Maui.Graphics.Skia以及SkiaSharp.Views.Maui.Controls。
1
2
3
4
| <ItemGroup>
<PackageReference Include="Microsoft.Maui.Graphics.Skia" Version="7.0.59" />
<PackageReference Include="SkiaSharp.Views.Maui.Controls" Version="2.88.3" />
</ItemGroup>
|
创建CircleSlider.xaml文件,添加如下内容:
1
2
3
4
5
6
7
8
9
10
11
12
13
| <?xml version="1.0" encoding="UTF-8"?>
<ContentView xmlns="http://schemas.microsoft.com/dotnet/2021/maui"
xmlns:x="http://schemas.microsoft.com/winfx/2009/xaml"
xmlns:forms="clr-namespace:SkiaSharp.Views.Maui.Controls;assembly=SkiaSharp.Views.Maui.Controls"
x:Class="MatoMusic.Controls.CircleSlider">
<ContentView.Content>
<forms:SKCanvasView x:Name="canvasView"
PaintSurface="OnCanvasViewPaintSurface" />
</ContentView.Content>
</ContentView>
|
SKCanvasView是SkiaSharp.Views.Maui.Controls封装的View控件。
打开CircleSlider.xaml.cs文件
控件将包含以下可绑定属性:
- Maximum:最大值
- Minimum:最小值
- Value:当前值
- TintColor:进度条颜色
- ContainerColor:进度条背景颜色
- BorderWidth:进度条宽度
定义两个SKPaint画笔属性,OutlinePaint用于绘制进度条背景,ArcPaint用于绘制进度条本身。他们的描边宽度StrokeWidth则是圆形进度条的宽度。
两个画笔的初始值样式为SKPaintStyle.Stroke,描边宽度为BorderWidth的值。
1
2
3
4
5
6
7
8
9
10
11
12
13
14
15
16
17
18
19
20
21
22
23
24
25
26
27
28
29
30
31
32
33
34
35
36
37
38
39
40
41
42
| private SKPaint _outlinePaint;
public SKPaint OutlinePaint
{
get
{
if (_outlinePaint == null)
{
SKPaint outlinePaint = new SKPaint
{
Style = SKPaintStyle.Stroke,
StrokeWidth = BorderWidth,
};
_outlinePaint = outlinePaint;
}
return
_outlinePaint;
}
set { _outlinePaint = value; }
}
private SKPaint _arcPaint;
public SKPaint ArcPaint
{
get
{
if (_arcPaint == null)
{
SKPaint arcPaint = new SKPaint
{
Style = SKPaintStyle.Stroke,
StrokeWidth = BorderWidth,
};
_arcPaint = arcPaint;
}
return _arcPaint;
}
set { _arcPaint = value; }
}
|
SetStrokeWidth用于设置描边宽度,并产生一个动效,

在BorderWidth发生变更的时候,会出现一个动效。宽度会缓慢地变化至新的值。刷新率为10ms一次,每次变化的值为1。
1
2
3
4
5
6
7
8
9
10
11
12
13
14
15
16
17
18
19
20
21
22
23
24
25
26
27
28
29
30
31
32
33
34
35
36
37
38
39
40
41
42
43
44
45
46
|
private float _borderWidth;

public float BorderWidth
{
    get { return _borderWidth; }
    set
    {
        var old_borderWidth = _borderWidth;

        var span = value - old_borderWidth;

        SetStrokeWidth(span, old_borderWidth);

        _borderWidth = value;

        this.ArcPaint.StrokeWidth = _borderWidth;
        this.OutlinePaint.StrokeWidth = _borderWidth;
    }
}

private async void SetStrokeWidth(float span, float old_borderWidth)
{
    if (span > 0)
    {
        for (int i = 0; i <= span; i++)
        {
            await Task.Delay(10);
            this.ArcPaint.StrokeWidth = old_borderWidth + i;
            this.OutlinePaint.StrokeWidth = old_borderWidth + i;
            RefreshMainRectPadding();
        }
    }
    else
    {
        for (int i = 0; i >= span; i--)
        {
            await Task.Delay(10);
            this.ArcPaint.StrokeWidth = old_borderWidth + i;
            this.OutlinePaint.StrokeWidth = old_borderWidth + i;
            RefreshMainRectPadding();

        }
    }

}
|
于此同时,因为描边宽度变化了,需要对Padding进行补偿。调用RefreshMainRectPadding方法计算一个新的Padding值,BoderWidth缩小时,Padding也随之增大。
1
2
3
4
| private void RefreshMainRectPadding()
{
this._mainRectPadding = this.BorderWidth / 2;
}
|
在视觉上,进度条宽度从内向外扩张变细。
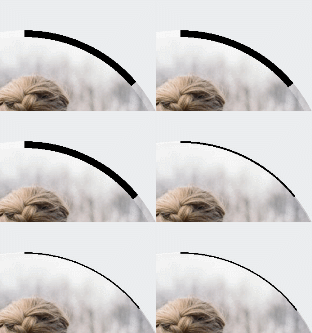
若设为原宽度减去计算值,从视觉上是从外向内收缩变细。
1
2
3
4
| private void RefreshMainRectPadding()
{
this._mainRectPadding = 15 - this.BorderWidth / 2;
}
|

接下来写订阅了CanvaseView的PaintSurface事件的方法OnCanvasViewPaintSurface。在这个方法中,我们将编写圆形进度条的绘制逻辑。
PaintSurface事件在绘制图形时触发。程序运行时会实时触发这个方法,它的参数SKPaintSurfaceEventArgs事件附带的对象具有两个属性:
- Info类型SKImageInfo
- Surface类型SKSurface
SKImageInfo对象包含如宽度和高度等有关绘图区域的信息,对象SKSurface为绘制本身,我们需要利用SKImageInfo宽度和高度等信息,结合业务数据,在SKSurface绘制出我们想要的图形。
清空上一次绘制的图形,调用SKSurface.Canvas获取Canvas对象,调用Canvas.Clear方法清空上一次绘制的图形。
rect是一个SKRect对象,进度条本身是圆形,我们需要一个正方形的区域来控制圆形区域。
sweepAngle是当前进度对应的角度,首先计算出总进度值,通过计算当前进度对应总进度的比值,换算成角度,将这一角度赋值给sweepAngle。
startAngle是进度条的起始角度,我们将其设置为-90度,即从正上方开始绘制。
1
2
3
4
|
SKRect rect = new SKRect(_mainRectPadding, _mainRectPadding, info.Width - _mainRectPadding, info.Height - _mainRectPadding);
float startAngle = -90;
float sweepAngle = (float)((Value / SumValue) * 360);
|
调用Canvas.DrawOval,使用OutlinePaint画笔绘制进度条背景,它是一个圆形
1
| canvas.DrawOval(rect, OutlinePaint);
|
创建绘制路径path,调用AddArc方法,将rect对象和起始角度和终止角度传入,即可绘制出弧形。
1
2
3
4
5
| using (SKPath path = new SKPath())
{
path.AddArc(rect, startAngle, sweepAngle);
canvas.DrawPath(path, ArcPaint);
}
|
绘制部分的完整代码如下:
1
2
3
4
5
6
7
8
9
10
11
12
13
14
15
16
17
18
19
20
21
22
23
24
25
| private void OnCanvasViewPaintSurface(object sender, SKPaintSurfaceEventArgs args)
{
var SumValue = Maximum - Minimum;
SKImageInfo info = args.Info;
SKSurface surface = args.Surface;
SKCanvas canvas = surface.Canvas;
canvas.Clear();
SKRect rect = new SKRect(_mainRectPadding, _mainRectPadding, info.Width - _mainRectPadding, info.Height - _mainRectPadding);
float startAngle = -90;
float sweepAngle = (float)((Value / SumValue) * 360);
canvas.DrawOval(rect, OutlinePaint);
using (SKPath path = new SKPath())
{
    path.AddArc(rect, startAngle, sweepAngle);
    canvas.DrawPath(path, ArcPaint);
}
}
|
使用控件
在MainPage.xaml中添加一个CircleSlider控件,
设置的Maximum,是当前曲目的时长,Value是当前曲目的进度
1
2
3
4
5
6
7
8
9
10
11
12
| <controls:CircleSlider
HeightRequest="250"
WidthRequest="250"
x:Name="MainCircleSlider"
Maximum="{Binding Duration}"
Minimum="0.0"
TintColor="#FFFFFF"
ContainerColor="#4CFFFFFF"
IsEnabled="{Binding Canplay}"
ValueChanged="OnValueChanged"
Value="{Binding CurrentTime,Mode=TwoWay} ">
</controls:CircleSlider>
|
创建专辑封面
使用MAUI的VisualElement中的Clip属性,创建Clip裁剪,可以传入一个Geometry对象,这里我们使用RoundRectangleGeometry,将它的CornerRadius属性设置为图片宽度的一半,即可实现圆形图片。
1
2
3
4
5
6
7
8
9
10
11
| <Image HeightRequest="250"
WidthRequest="250"
Margin="7.5"
Source="{Binding CurrentMusic.AlbumArt}"
VerticalOptions="CenterAndExpand"
HorizontalOptions="CenterAndExpand"
Aspect="AspectFill">
<Image.Clip>
<RoundRectangleGeometry CornerRadius="125" Rect="0,0,250,250" />
</Image.Clip>
</Image>
|
设置一个半透明背景的播放状态指示器,当IsPlaying为False时将显示一个播放按钮
1
2
3
4
5
6
7
8
9
10
11
12
13
14
15
| <Grid IsVisible="{Binding IsPlaying, Converter={StaticResource True2FalseConverter}}">
<BoxView HeightRequest="250"
WidthRequest="250"
Margin="7.5"
Color="#60000000"
VerticalOptions="CenterAndExpand"
HorizontalOptions="CenterAndExpand"
CornerRadius="250" ></BoxView>
<Label x:Name="PauseLabel"
HorizontalOptions="CenterAndExpand"
FontSize="58"
TextColor="{Binding Canplay,Converter={StaticResource Bool2StringConverter},ConverterParameter=White|#434343}"
FontFamily="FontAwesome"
Margin="0"></Label>
</Grid>
|

创建PanContainer对象,用于实现拖动效果,设置AutoAdsorption属性为True,即可实现拖动后自动吸附效果。
关于PanContainer请查看上期的文章:平移手势交互
用一个Grid将专辑封面,CircleSlider,以及播放状态指示器包裹起来。完整代码如下
1
2
3
4
5
6
7
8
9
10
11
12
13
14
15
16
17
18
19
20
21
22
23
24
25
26
27
28
29
30
31
32
33
34
35
36
37
38
| <controls1:PanContainer BackgroundColor="Transparent"
x:Name="DefaultPanContainer"
OnTapped="DefaultPanContainer_OnOnTapped"
AutoAdsorption="True"
OnfinishedChoise="DefaultPanContainer_OnOnfinishedChoise">
<Grid PropertyChanged="BindableObject_OnPropertyChanged"
VerticalOptions="Start"
HorizontalOptions="Start">
<Image HeightRequest="250"
        WidthRequest="250"
        Margin="7.5"
        Source="{Binding  CurrentMusic.AlbumArt}"
        VerticalOptions="CenterAndExpand"
        HorizontalOptions="CenterAndExpand"
        Aspect="AspectFill">
    <Image.Clip>
        <RoundRectangleGeometry  CornerRadius="125" Rect="0,0,250,250" />
    </Image.Clip>
</Image>
<controls:CircleSlider>...</controls:CircleSlider>
<Grid IsVisible="{Binding IsPlaying, Converter={StaticResource True2FalseConverter}}">
    <BoxView HeightRequest="250"
            WidthRequest="250"
            Margin="7.5"
            Color="#60000000"
            VerticalOptions="CenterAndExpand"
            HorizontalOptions="CenterAndExpand"
            CornerRadius="250" ></BoxView>
    <Label  x:Name="PauseLabel"
            HorizontalOptions="CenterAndExpand"
            FontSize="58"
            TextColor="{Binding Canplay,Converter={StaticResource Bool2StringConverter},ConverterParameter=White|#434343}"
            FontFamily="FontAwesome"
            Margin="0"></Label>
</Grid>
</Grid>
</controls1:PanContainer>
|

以上就是这个项目的全部内容,感谢阅读
项目地址
Github:maui-samples


