前端代码的框架采用vue.js + elementUI 这套较为简单的方式实现,以及typescript语法更方便阅读。
首先添加全局对象:
loginForm: 登录表单对象
1
2
3
4
5
6
7
8
9
loginForm: { //登录对象 username: "", password: "", twoFactorAuthenticationToken: "", twoFactorAuthenticationProvider: "Phone", }, twoFactorData: null, showTwoFactorSuccess: false,
发送验证码 编写发送验证码函数sendVerificationCode,发送验证码后,启动定时器,60秒后可以再次发送验证码。
1
2
3
4
5
6
7
8
9
10
11
12
13
14
15
16
17
18
19
20
21
22
23
24
25
26
27
async sendVerificationCode() { this.smsSendCd = 60; this.timer = setInterval(() => { this.smsSendCd--; if (this.smsSendCd <= 0) { clearInterval(this.timer); } }, 1000); await request( `${this.host}api/TokenAuth/SendTwoFactorAuthenticateCaptcha`, "post", { provider: "Phone", userId: this.twoFactorData.userId, } ) .catch((re) => { var res = re.response.data; this.errorMessage(res.error.message); }) .then((re) => { var res = re.data.result; this.showTwoFactorSuccess = true; this.showTwoFactorSuccess = false; this.successMessage("发送验证码成功"); }); },
request 是利用axios库发送带有访问凭证Header请求功能的封装 ,ajaxRequest.ts请参考博文使用 Abp.Zero 搭建第三方登录模块(三):网页端开发
这里使用js-cookie库获取cookie中的访问凭证,并添加到Header中
1
2
3
4
5
6
7
import { request } from "@/ajaxRequire"; import Cookies from "js-cookie"; const tokenKey = "main_token"; const setToken = (token: string) => Cookies.set(tokenKey, token); const cleanToken = () => Cookies.remove(tokenKey); const getToken = () => Cookies.get(tokenKey);
登录 编写登录函数handleLogin:
1
2
3
4
5
6
7
8
9
10
11
12
13
14
15
16
17
18
19
20
21
22
23
24
25
26
27
28
29
30
31
32
33
34
35
36
37
38
async handleLogin() { this.loading = true; var userNameOrEmailAddress = this.loginForm.username; var password = this.loginForm.password; var twoFactorAuthenticationToken = this.loginForm.twoFactorAuthenticationToken; var twoFactorAuthenticationProvider = this.loginForm.twoFactorAuthenticationProvider; userNameOrEmailAddress = userNameOrEmailAddress.trim(); await request(`${this.host}api/TokenAuth/Authenticate`, "post", { userNameOrEmailAddress, password, twoFactorAuthenticationToken, twoFactorAuthenticationProvider, }) .catch((re) => { var res = re.response.data; this.errorMessage(res.error.message); }) .then(async (res) => { var data = res.data.result; if (data.requiresTwoFactorAuthenticate) { this.twoFactorData = data; } else { setToken(data.accessToken); setRememberClientToken(data.rememberClientToken); await this.getCurrentUser(); } }) .finally(() => { setTimeout(() => { this.loading = false; }, 1.5 * 1000); }); },
请注意,当需要进行两步验证时,requiresTwoFactorAuthenticate会返回true,同时返回
退出登录 登出, 将Token以及用户信息置空
1
2
3
4
5
6
7
<el-button :loading="loading" type="danger" style="width: 100%" @click.native.prevent="logout"> 退出登录 </el-button>
1
2
3
4
5
logout() { setToken(null); this.token = null; this.userInfo = null; },
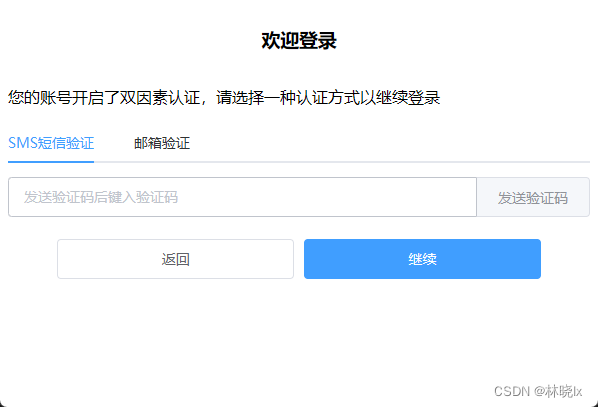
界面控件 在登录表单的HTML中,添加两步验证控件:
根据twoFactorAuthenticationProviders。我们采用了两种方式,一种是短信验证码,一种是邮箱验证码,这里我们采用了elementUI的tab组件,来实现两种方式的切换。
1
2
3
4
5
6
7
8
9
10
11
12
13
14
15
16
17
18
19
20
21
22
23
24
25
26
27
28
29
30
31
32
33
34
35
36
37
38
39
40
41
42
43
44
45
46
47
48
49
50
51
52
53
54
55
56
57
58
59
60
61
62
63
64
65
66
67
68
69
70
71
72
73
74
75
76
77
78
79
80
81
82
83
84
85
86
87
88
89
90
91
92
93
94
95
96
97
98
99
100
101
102
103
104
105
106
107
108
109
110
111
112
113
114
115
116
117
<el-form ref="loginForm" :model="loginForm" class="login-form" autocomplete="on" label-position="left" > <template v-if="twoFactorData == null"> ... </template> <template v-else> <p>您的账号开启了两步验证,请选择一种认证方式以继续登录</p> <el-tabs v-model="loginForm.twoFactorAuthenticationProvider" tab-position="top" > <el-tab-pane :lazy="true" label="SMS短信验证" name="Phone" :disabled=" twoFactorData.twoFactorAuthenticationProviders.indexOf( 'Email' ) == -1 " > <el-row> <el-col :span="24" style=" { margin-bottom: 10px; } " > <el-alert v-if="showTwoFactorSuccess" title="验证码已发送至用户的手机号,请查收" type="info" > </el-alert> </el-col> <el-col :span="24"> <el-form-item class="item" prop="twoFactorAuthenticationToken" > <el-input v-model="loginForm.twoFactorAuthenticationToken" :placeholder="'发送验证码后键入验证码'" tabindex="2" autocomplete="on" @blur="capsTooltip = false" > <el-button slot="append" :disabled="smsSendCd > 0" @click="sendVerificationCode" >{{ smsSendCd == 0 ? "发送验证码" : smsSendCd + "后重试" }}</el-button > </el-input> </el-form-item> </el-col> </el-row> </el-tab-pane> <el-tab-pane :lazy="true" label="邮箱验证" name="Email" :disabled=" twoFactorData.twoFactorAuthenticationProviders.indexOf( 'Email' ) == -1 " > <el-row> <el-col :span="24"> <el-alert v-if="showTwoFactorSuccess" title="验证码已发送至登录用户对应的邮箱,请查收" type="info" > </el-alert> </el-col> <el-col :span="24"> ... </el-col> </el-row> </el-tab-pane> </el-tabs> </template> <el-row type="flex" class="row-bg" justify="center" :gutter="10"> <el-col :span="10" v-if="twoFactorData != null"> <el-button :loading="loading" style="width: 100%" @click.native.prevent="twoFactorData = null" > 返回 </el-button> </el-col> <el-col :span="10"> <el-button :loading="loading" type="primary" style="width: 100%" @click.native.prevent="handleLogin" > {{ twoFactorData == null ? "登录" : "继续" }} </el-button> </el-col> </el-row> </el-form>
获取用户信息功能 登录成功后我们要拿到当前用户的信息,存入userInfo对象,并在页面上简单展示
1 <span>{{ userInfo }}</span>
创建一个获取当前用户的函数
1
2
3
4
5
6
7
8
9
10
11
12
13
14
15
16
17
18
19
20
21
22
async getCurrentUser() { await request( `${this.host}${this.prefix}/User/GetCurrentUser`, "get", null ) .catch((re) => { var res = re.response.data; this.errorMessage(res.error.message); }) .then(async (re) => { var result = re.data.result as any; this.userInfo = result; this.token = getToken(); clearInterval(this.timer); this.smsSendCd = 0; this.currentVerifyingType = null; this.successMessage("登录成功"); }); }
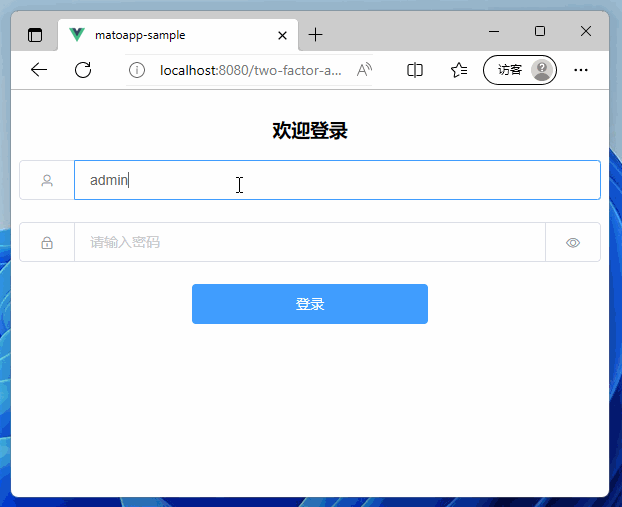
最终效果
项目地址 Github:matoapp-samples