[MAUI]模仿哔哩哔哩的一键三连

哔哩哔哩(Bilibili)中用户可以通过长按点赞键同时完成点赞、投币、收藏对UP主表示支持,后UP主多用“一键三连”向视频浏览者请求对其作品同时进行点赞、投币、收藏。

在这里插入图片描述

“三连按钮”是一组按钮,轻击时当做普通状态按钮使用,当长按 2 秒钟后,转为三连模式,可以控制并显示进度,并在进度完成时弹出一些泡泡

一直想实现这个效果,但由于.NET MAUI对图形填充渲染问题直到.NET 8才修复。想要的效果直到最近才能实现。

两年前Dino老师用UWP实现过“一键三连”:

[UWP]模仿哔哩哔哩的一键三连

今天用MAUI实现。

在这里插入图片描述

使用.NET MAU实现跨平台支持,本项目可运行于Android、iOS平台。

创建弧形进度条

新建.NET MAUI项目,命名HoldDownButtonGroup

在项目中添加SkiaSharp绘制功能的引用Microsoft.Maui.Graphics.Skia以及SkiaSharp.Views.Maui.Controls

1
2
3
4
<ItemGroup>
<PackageReference Include="Microsoft.Maui.Graphics.Skia" Version="7.0.59" />
<PackageReference Include="SkiaSharp.Views.Maui.Controls" Version="2.88.3" />
</ItemGroup>

进度条(ProgressBar)用于展示任务的进度,告知用户当前状态和预期,本项目依赖弧形进度条组件(CircleProgressBar),此组件在本项目中用于展示“三连按钮”长按任务的进度

这里简单介绍弧形进度条组件的原理和实现,更多内容请阅读:[MAUI]弧形进度条与弧形滑块的交互实现

控件将包含以下可绑定属性:

  • Maxiumum:最大值
  • Minimum:最小值
  • Progress:当前进度
  • AnimationLength:动画时长
  • BorderWidth:描边宽度
  • LabelContent:标签内容
  • ContainerColor:容器颜色,即进度条的背景色
  • ProgressColor:进度条颜色

创建CircleProgressBar.xaml,代码如下:

1
2
3
4
5
6
7
8
9
10
11
12
13
14
15
16
17
18
19
<?xml version="1.0" encoding="UTF-8"?>
<ContentView xmlns="http://schemas.microsoft.com/dotnet/2021/maui"
xmlns:x="http://schemas.microsoft.com/winfx/2009/xaml"
xmlns:forms="clr-namespace:SkiaSharp.Views.Maui.Controls;assembly=SkiaSharp.Views.Maui.Controls"
x:Class="HoldDownButtonGroup.Controls.CircleProgressBar">
<ContentView.Content>
<Grid>
<forms:SKCanvasView x:Name="canvasView"
PaintSurface="OnCanvasViewPaintSurface" />
<ContentView x:Name="MainContent"></ContentView>
<Label
FontSize="28"
HorizontalOptions="Center"
VerticalOptions="Center"
x:Name="labelView"></Label>
</Grid>

</ContentView.Content>
</ContentView>

SKCanvasView是SkiaSharp.Views.Maui.Controls封装的View控件。

绘制弧

Skia中,通过AddArc方法绘制弧,需要传入一个SKRect对象,其代表一个弧(或椭弧)的外接矩形。startAngle和sweepAngle分别代表顺时针起始角度和扫描角度。

通过startAngle和sweepAngle可以绘制出一个弧,如下图红色部分所示:

在这里插入图片描述

CircleProgressBar.xaml.cs的CodeBehind中,创建OnCanvasViewPaintSurface,通过给定起始角度为正上方,扫描角度为360对于100%进度,通过插值计算出当前进度对应的扫描角度,绘制出进度条。

1
2
3
4
5
6
7
8
9
10
11
12
13
14
15
16
17
18
19
20
21
22
23
24
25
private void OnCanvasViewPaintSurface(object sender, SKPaintSurfaceEventArgs args)
{

var SumValue = Maximum - Minimum;


SKImageInfo info = args.Info;
SKSurface surface = args.Surface;
SKCanvas canvas = surface.Canvas;

canvas.Clear();

SKRect rect = new SKRect(_mainRectPadding, _mainRectPadding, info.Width - _mainRectPadding, info.Height - _mainRectPadding);
float startAngle = -90;
float sweepAngle = (float)((_realtimeProgress / SumValue) * 360);

canvas.DrawOval(rect, OutlinePaint);

using (SKPath path = new SKPath())
{
path.AddArc(rect, startAngle, sweepAngle);

canvas.DrawPath(path, ArcPaint);
}
}

其中SumValue表明进度条的总进度,通过Maximum和Minimum计算得出。

1
2
public double SumValue => Maximum - Minimum;

创建进度条轨道背景画刷和进度条画刷,其中进度条画刷的StrokeCap属性设置为SKStrokeCap.Round,使得进度条两端为圆形。

1
2
3
4
5
6
7
8
9
10
11
12
13
14
15
16
17
18
19
20
21
22
23
24
25
26
27
28
29
30
31
32
33
34
35
36
37
38
39
40
41
42
43
44
protected SKPaint _outlinePaint;

public SKPaint OutlinePaint
{
get
{
if (_outlinePaint == null)
{
RefreshMainRectPadding();
SKPaint outlinePaint = new SKPaint
{
Color = this.ContainerColor.ToSKColor(),
Style = SKPaintStyle.Stroke,
StrokeWidth = (float)BorderWidth,
};
_outlinePaint = outlinePaint;
}
return _outlinePaint;
}
}

protected SKPaint _arcPaint;

public SKPaint ArcPaint
{
get
{
if (_arcPaint == null)
{
RefreshMainRectPadding();
SKPaint arcPaint = new SKPaint
{
Color = this.ProgressColor.ToSKColor(),
Style = SKPaintStyle.Stroke,
StrokeWidth = (float)BorderWidth,
StrokeCap = SKStrokeCap.Round,
};
_arcPaint = arcPaint;
}

return _arcPaint;
}
}

在Progress值变更时,重新渲染进度条,并触发ValueChanged事件。

1
2
3
4
5
6
7

private void UpdateProgress()
{
this._realtimeProgress = this.Progress;
this.labelView.Text = this.Progress.ToString(LABEL_FORMATE);
this.canvasView?.InvalidateSurface();
}

效果如下

在这里插入图片描述

准备物料

点赞、投币、收藏三个按钮的图片来自于哔哩哔哩(Bilibili)网站。这些按钮用svg格式在html中。

我们只需前往哔哩哔哩主站,要打开浏览器的开发者工具,用元素检查器,在找到按钮位置后查看其样式,拷贝path中的svg代码,即可得到这些矢量图片。

拷贝右侧红色区域选中的部分,我们只需要这些svg代码。

在Xaml中我们创建Path元素,并设置Data属性为svg代码。即可得到一个图形

1
2
3
4
5
6
7
8
<Path HeightRequest="65"
WidthRequest="65"
x:Name="Icon1"
Fill="Transparent"
Aspect="Uniform"
Data="M 9.77234 30.8573 V 11.7471 H 7.54573 C 5.50932 11.7471 3.85742 13.3931 3.85742 15.425 V 27.1794 C 3.85742 29.2112 5.50932 30.8573 7.54573 30.8573 H 9.77234 Z M 11.9902 30.8573 V 11.7054 C 14.9897 10.627 16.6942 7.8853 17.1055 3.33591 C 17.2666 1.55463 18.9633 0.814421 20.5803 1.59505 C 22.1847 2.36964 23.243 4.32583 23.243 6.93947 C 23.243 8.50265 23.0478 10.1054 22.6582 11.7471 H 29.7324 C 31.7739 11.7471 33.4289 13.402 33.4289 15.4435 C 33.4289 15.7416 33.3928 16.0386 33.3215 16.328 L 30.9883 25.7957 C 30.2558 28.7683 27.5894 30.8573 24.528 30.8573 H 11.9911 H 11.9902 Z"
VerticalOptions="Center"
HorizontalOptions="Center" />

在这里插入图片描述

创建气泡

气泡实现分为两个步骤:

Bubble.xaml 创建单一气泡动画
Bubbles.xaml 包含气泡集群。随机生成气泡动画路径,创建气泡集群的动画

Bubbles控件将包含以下可绑定属性:

  • Brush:气泡颜色
  • BubbleCnt:气泡数量
  • BubbleSize:气泡大小

气泡动画算法参考于火火的 BubbleButton,这里只帖关键代码

单一气泡的动画:先变大后消失

1
2
3
4
5
6
7
8
9
10
11
12
13
14
15
16
17
18
19
20
21
public Animation GetAnimation()
{

var scaleAnimation = new Animation();

var scaleUpAnimation0 = new Animation(v => MainBox.Scale = v, 0, 1);
var scaleUpAnimation1 = new Animation(v => MainBox.Scale = v, 1, 0);


scaleAnimation.Add(0, 0.2, scaleUpAnimation0);
scaleAnimation.Add(0.8, 1, scaleUpAnimation1);

scaleAnimation.Finished = () =>
{
this.MainBox.Scale = 0;
};

return scaleAnimation;

}

生成气泡

1
2
3
4
5
6
7
8
9
10
11
12
13
14
15
16
public void SpawnBubbles()
{
this.PitContentLayout.Clear();
for (int i = 0; i < BubbleCnt; i++)
{
var currentBox = new Bubble();
currentBox.FillColor = i % 2 == 0 ? this.Brush : SolidColorBrush.Transparent;
currentBox.BorderColor = this.Brush;
currentBox.HeightRequest = BubbleSize;
currentBox.WidthRequest = BubbleSize;
currentBox.HorizontalOptions = LayoutOptions.Start;
currentBox.VerticalOptions = LayoutOptions.Start;
this.PitContentLayout.Add(currentBox);
}
}

计算单个气泡的动画路径:随机产生动画运动的随机坐标

1
2
3
4
5
6
7
8
9
10
11
12
13
14
15
16
17
18
19
20
21
22
23
24
25
26
27
28
29
30
31
32
33
34
35
36
37
38
39
40
41
42
43
44
private Animation InitAnimation(Bubble element, Size targetSize, bool isOnTop = true)
{


var offsetAnimation = new Animation();

if (targetSize == default)
{
targetSize = element.DesiredSize;

}
var easing = Easing.Linear;

var originX = PitContentLayout.Width / 2;
var originY = PitContentLayout.Height / 2;

var targetX = rnd.Next(-(int)targetSize.Width, (int)targetSize.Width) + (int)targetSize.Width / 2 + originX;
var targetY = isOnTop ? rnd.Next(-(int)(targetSize.Height * 1.5), 0) + (int)targetSize.Height / 2 + originY :
rnd.Next(0, (int)(targetSize.Height * 1.5)) + (int)targetSize.Height / 2 + originY
;


var offsetX = targetX - originX;
var offsetY = targetY - originY;


var offsetAnimation1 = new Animation(v => element.TranslationX = v, originX - targetSize.Width / 2, targetX - targetSize.Width / 2, easing);
var offsetAnimation2 = new Animation(v => element.TranslationY = v, originY - targetSize.Height / 2, targetY - targetSize.Height / 2, easing);

offsetAnimation.Add(0.2, 0.8, offsetAnimation1);
offsetAnimation.Add(0.2, 0.8, offsetAnimation2);
offsetAnimation.Add(0, 1, element.BoxAnimation);

offsetAnimation.Finished = () =>
{

element.TranslationX = originX;
element.TranslationY = originY;
element.Rotation = 0;
};

return offsetAnimation;
}

开始气泡动画

1
2
3
4
5
6
7
8
9
10
11
12
13
14
15
16
17
18
19
20
21
public void StartAnimation()
{

Content.AbortAnimation("ReshapeAnimations");
var offsetAnimationGroup = new Animation();

foreach (var item in this.PitContentLayout.Children)
{
if (item is Bubble)
{
var isOntop = this.PitContentLayout.Children.IndexOf(item) > this.PitContentLayout.Children.Count / 2;
var currentAnimation = InitAnimation(item as Bubble, targetSize, isOntop);
offsetAnimationGroup.Add(0, 1, currentAnimation);


}
}
offsetAnimationGroup.Commit(this, "ReshapeAnimations", 16, 400);

}

创建手势

可喜可贺,在新发布的.NET 8 中, .NET MAUI 引入了指针手势识别器(PointerGestureRecognizer),使用方式如下,终于不用自己实现手势监听控件了。

Xaml:

1
2
3
4
5
6
7
<Image Source="dotnet_bot.png">
<Image.GestureRecognizers>
<PointerGestureRecognizer PointerEntered="OnPointerEntered"
PointerExited="OnPointerExited"
PointerMoved="OnPointerMoved" />
</Image.GestureRecognizers>
</Image>

C#:

1
2
3
4
5
6
7
8
9
10
11
12
13
14
void OnPointerEntered(object sender, PointerEventArgs e)
{
// Handle the pointer entered event
}

void OnPointerExited(object sender, PointerEventArgs e)
{
// Handle the pointer exited event
}

void OnPointerMoved(object sender, PointerEventArgs e)
{
// Handle the pointer moved event
}

具体请阅读官方文档:
.NET 8 中 .NET MAUI 的新增功能以及
识别指针手势

在本项目中,需要监听长按动作,当“三连按钮”长按2秒后,转为三连模式,此时需要监听手指释放情况,当时长不足时取消三连。

由于在之前的文章中实现过监听手势,这里仅简单介绍定义,其余内容不再重复,如需了解请阅读: [MAUI程序设计] 用Handler实现自定义跨平台控件

定义可以监听的手势类别,分别是按下、移动、抬起、取消、进入、退出

1
2
3
4
5
6
7
8
9
10

public enum TouchActionType
{
Entered,
Pressed,
Moved,
Released,
Exited,
Cancelled
}

添加手势监听器TouchRecognizer,它将提供一个事件OnTouchActionInvoked,用触发手势动作。

1
2
3
4
5
public partial class TouchRecognizer: IDisposable
{
public event EventHandler<TouchActionEventArgs> OnTouchActionInvoked;
public partial void Dispose();
}

EventArg类TouchActionEventArgs,用于传递手势动作的参数

创建交互与动效

在页面创建完三个按钮后,在CodeBehind中编写交互逻辑

添加更新圆环进度的方法UpdateProgressWithAnimate,此方法根据圆环进度的百分比,计算圆环进度的动画时间,并开始动画

1
2
3
4
5
6
7
8
9
10
11
12
13
14
15
16
17
18
19
20
21
22

private void UpdateProgressWithAnimate(CircleProgressBar progressElement, double progressTarget = 100, double totalLenght = 5*1000, Action<double, bool> finished = null)
{
Content.AbortAnimation("ReshapeAnimations");
var scaleAnimation = new Animation();

double progressOrigin = progressElement.Progress;

var animateAction = (double r) =>
{
progressElement.Progress = r;
};

var scaleUpAnimation0 = new Animation(animateAction, progressOrigin, progressTarget);

scaleAnimation.Add(0, 1, scaleUpAnimation0);
var calcLenght = (double)(Math.Abs((progressOrigin - progressTarget) / 100)) * totalLenght;

scaleAnimation.Commit(progressElement, "ReshapeAnimations", 16, (uint)calcLenght, finished: finished);

}

创建“三连成功”的动画方法StartCelebrationAnimate,在这里通过改变按钮的Scale和Fill属性,实现三连成功时“点亮”图标的动画效果。

1
2
3
4
5
6
7
8
9
10
11
12
13
14
15
16
17
18
19
20

private void StartCelebrationAnimate(Path progressElement, Action<double, bool> finished = null)
{
var toColor = (Color)this.Resources["BrandColor"];
var fromColor = (Color)this.Resources["DisabledColor"];

var scaleAnimation = new Animation();

var scaleUpAnimation0 = new Animation(v => progressElement.Scale=v, 0, 1.5);
var scaleUpAnimation1 = new Animation(v => progressElement.Fill=GetColor(v, fromColor, toColor), 0, 1);
var scaleUpAnimation2 = new Animation(v => progressElement.Scale=v, 1.5, 1);

scaleAnimation.Add(0, 0.5, scaleUpAnimation0);
scaleAnimation.Add(0, 1, scaleUpAnimation1);
scaleAnimation.Add(0.5, 1, scaleUpAnimation2);

scaleAnimation.Commit(progressElement, "CelebrationAnimate", 16, 400, finished: finished);

}

按钮触发TouchContentView_OnTouchActionInvoked事件:

_dispatcherTimer作用是延时1秒,如果按钮被点击,则开始执行后续操作。当按钮被点击时此Timer会开。

一秒后,开始进入“三连模式”,此时更新圆环进度,当进度完成后开始气泡动画和“三连成功”的动画。

若中途按钮被释放,则取消此Timer,并重置圆环进度。

若按钮未进入“三连模式”,则直接播放按钮的点击动画。

1
2
3
4
5
6
7
8
9
10
11
12
13
14
15
16
17
18
19
20
21
22
23
24
25
26
27
28
29
30
31
32
33
34
35
36
37
38
39
40
41
42
43
44
45
46
47
48
49
50
51
52
53
54
55
56
57
58
59
60
61
62
63
64
65
66
67
68
69
70
71
72
73
74
75
76
77
78
79
80
81
82
83
84
85
86
87
88
89
90
91
92
93
94
95
96
97
98
99
100
101
102
103
104
105
106
107
108
109
110
111
112
113
114
115
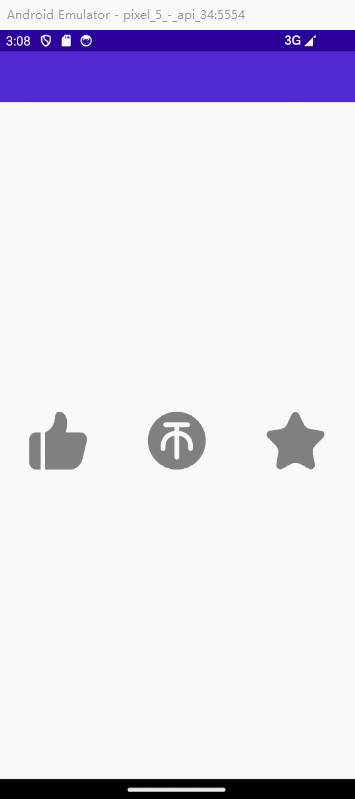
private void TouchContentView_OnTouchActionInvoked(object sender, TouchActionEventArgs e)
{
var layout = ((Microsoft.Maui.Controls.Layout)(sender as TouchContentView).Content).Children;
var bubbles = layout[0] as Bubbles;
var circleProgressBar = layout[1] as CircleProgressBar;


switch (e.Type)
{
case TouchActionType.Entered:
break;
case TouchActionType.Pressed:
_dispatcherTimer =Dispatcher.CreateTimer();
_dispatcherTimer.Interval=new TimeSpan(0, 0, 1);

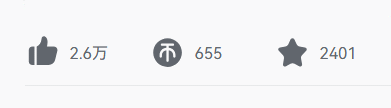
_dispatcherTimer.Tick+= async (o, e) =>
{
_isInProgress=true;
this.UpdateProgressWithAnimate(ProgressBar1, 100, 2*1000, (d, b) =>
{
if (circleProgressBar.Progress==100)
{
this.bubbles1.StartAnimation();
StartCelebrationAnimate(this.Icon1);
}
});
this.UpdateProgressWithAnimate(ProgressBar2, 100, 2*1000, (d, b) =>
{
if (circleProgressBar.Progress==100)
{
this.bubbles2.StartAnimation();
StartCelebrationAnimate(this.Icon2);
}
});
this.UpdateProgressWithAnimate(ProgressBar3, 100, 2*1000, (d, b) =>
{
if (circleProgressBar.Progress==100)
{
this.bubbles3.StartAnimation();
StartCelebrationAnimate(this.Icon3);
}
});

};

_dispatcherTimer.Start();


break;
case TouchActionType.Moved:
break;
case TouchActionType.Released:

if (!_isInProgress)
{
var brandColor = (Color)this.Resources["BrandColor"];
var disabledColor = (Color)this.Resources["DisabledColor"];

if (circleProgressBar.Progress==100)
{
this.UpdateProgressWithAnimate(ProgressBar1, 0, 1000);
this.UpdateProgressWithAnimate(ProgressBar2, 0, 1000);
this.UpdateProgressWithAnimate(ProgressBar3, 0, 1000);
(ProgressBar1.LabelContent as Path).Fill=disabledColor;
(ProgressBar2.LabelContent as Path).Fill=disabledColor;
(ProgressBar3.LabelContent as Path).Fill=disabledColor;


}
else
{
if (((circleProgressBar.LabelContent as Path).Fill as SolidColorBrush).Color==disabledColor)
{
StartCelebrationAnimate(circleProgressBar.LabelContent as Path);

}
else
{
(circleProgressBar.LabelContent as Path).Fill=disabledColor;
}
}


}
if (_dispatcherTimer!=null)
{
if (_dispatcherTimer.IsRunning)
{
_dispatcherTimer.Stop();
_isInProgress=false;

}
_dispatcherTimer=null;

if (circleProgressBar.Progress==100)
{
return;
}

this.UpdateProgressWithAnimate(ProgressBar1, 0, 1000);
this.UpdateProgressWithAnimate(ProgressBar2, 0, 1000);
this.UpdateProgressWithAnimate(ProgressBar3, 0, 1000);
}


break;
case TouchActionType.Exited:
break;
case TouchActionType.Cancelled:
break;
default:
break;
}
}

进入三联模式动画效果如下:
在这里插入图片描述

未进入三联模式动画效果如下:

在这里插入图片描述

最终效果如下:

在这里插入图片描述

项目地址

Github:maui-samples

[MAUI]模仿哔哩哔哩的一键三连

https://blog.matoapp.net/posts/a6dfa37/

作者

林晓lx

发布于

2024-03-25

更新于

2024-09-11

许可协议

评论